3D scanning for metrology
At times, traditional CMMs can struggle to rapidly and non-invasively measure objects, particularly when these feature holes or brittle surfaces. Fortunately, advances in 3D scanning mean it can now counter such difficulties. As such, the technology is starting to compete with CMM systems as a means of addressing various part inspection applications.
What is 3D metrology?
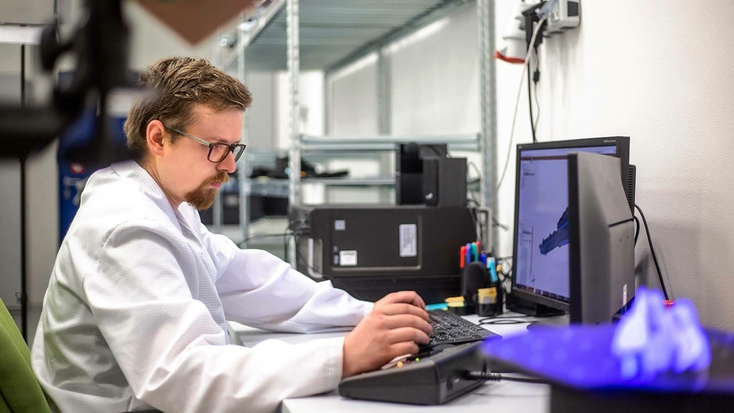
An engineer analyzing data captured via 3D metrology.
In the world of manufacturing, quality is king. It’s all well and good churning out parts at an industrial scale, but if they don’t work as desired, they aren’t much good to end users. When it comes to gauging whether or not they are up to scratch, manufacturers tend to measure components’ dimensions against their initial designs. The process of rooting out such part defects is one of many to rely on technologies often described as 3D metrology solutions.
The term can generally be used to describe any method of gaining precise 3D measurements of a part’s surfaces. Prior to the introduction of automated tools, these analyses tended to be carried out manually via instruments like micrometers and height gauges. More recently, Coordinate Measurement Machines (CMMs) have been introduced. These systems can be fitted with tactile or optical sensors that run along an object’s surface, picking up features as they go.
KEY POINT
CMMs were the industry standard for 3D metrology, but 3D scanners are now challenging their supremacy.
CMMs aren’t without their drawbacks. Many CMMs use touch-trigger probes that need to make contact with every surface in order to inspect a part. When you need to scan intricate surfaces or products with hard-to-reach areas, this can become a hindrance to accuracy, with obscured details having to be added via software later on. The need to touch parts also raises the risk of damaging them, and it’s not unheard of for CMMs to cause scratches or scrapes. These issues can make the technology unappealing to those working with objects that they can’t afford to spoil or measure incorrectly, like forensic analysts or archeologists.
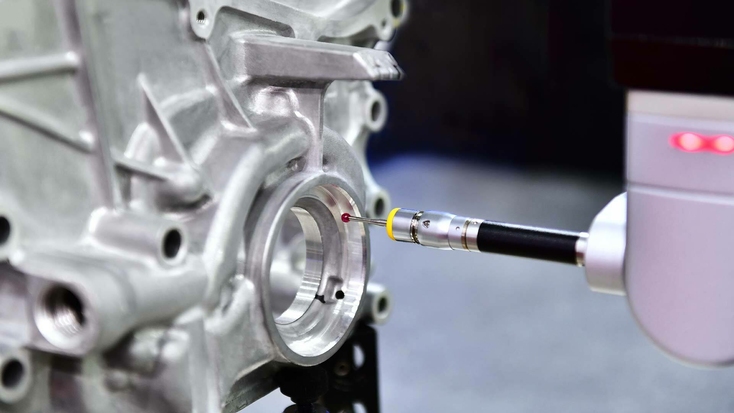
A close-up of a Coordinate Measurement Machine (CMM) probe being used to inspect a part.
Other challenges such as affordability and space constraints also need to be considered when installing CMMs. Not only do the machines have a lofty upfront cost (sometimes as high as $250,000), but they require the support of ventilation and vibration-dampening equipment.
Then there’s lead time. The finite nature of CMM sensor tips means they can only capture so much data in one sweep. This can make measuring large, complex structures a real chore for machine operators and ultimately threaten the viability of meeting project deadlines.
It’s these speed, cost, and accuracy inefficiencies that are increasingly making 3D scanning a more attractive alternative to CMMs in the field of 3D metrology.
Types of metrology 3D scanner
It may seem obvious, but three of the first things you need to consider before adopting a metrology 3D scanner are the size, complexity, and accuracy of your target object. These key factors will play a significant role in determining which of the devices on the market are best suited to meeting your precision measurement needs.
Desktop 3D scanners
Designed to enable the creation of microscale models with ultra-high resolution and accuracy, desktop metrology systems are capable of picking up the tiniest of surface details. This makes such 3D scanners perfect for office or lab-based reverse engineering or inspection.

A small, intricate object being digitized with an Artec Micro II 3D scanner.
Ideally, these components will be smaller than a fist though, as anything much larger is likely to be beyond a desktop system’s capacity. With this in mind, compact metrology 3D scanners are unsurprisingly ideal for capturing tiny, complex components, and they can even measure those with reflective surfaces. Such machines are often used to reverse engineer or inspect the quality of intricate industrial parts, including bearings, impellers, and valves, whether these be plastic injection molded or 3D printed. They’re also used in other industries like dental and jewelry.
Handheld 3D scanners
Seeking a portable metrological 3D scanning solution that can be deployed free from constraints with true freedom of movement? If so, handheld 3D metrology devices may be right for you. These provide users with the flexibility to scan medium-to-large objects at pace. If the 3D scanner is wireless, these benefits are only amplified, as greater maneuverability naturally makes it easier to scan difficult surfaces and objects with complex features.
Given that there are so many handheld devices out there, with varying range, texture resolution, and point capture capabilities, it’s also easiest for new adopters to find one that suits their application needs, in this category.
Accessibility is another of the alluring factors that continues to make handheld 3D scanning an attractive alternative to bulky, expensive CMMs. More often than not, 3D scanners are cheaper to adopt and easier to use. With Artec Leo, you can even use its combined built-in color camera and 3D camera to track scan progress in real time via its display.
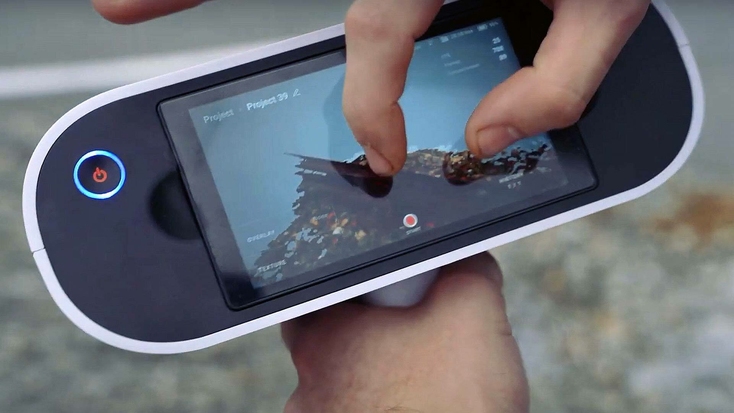
The interactive 5.5" touch panel of the wireless, AI-powered Artec Leo 3D scanner.
Those working in industrial manufacturing can also automate part inspection. Handheld 3D scanning devices can usually be mounted to robotic arms, which in turn, can be controlled with AI in a way that allows part batches to be measured using the ideal scanning path, unlocking capture speed and accuracy benefits.
KEY POINT
Handheld 3D scanners tend to be good all-rounders when it comes to speed, accuracy, and scale. Also, they often have the lowest cost of entry, making them the most popular option!
Robotics-mounted 3D scanners
This moves us on to robot arm-mounted scanning solutions. While not a distinct type of 3D laser scanner themselves, such setups still represent an interesting means of automation. Whether we’re talking handheld systems or long-range laser scanners, mechanization offers plenty of potential benefits, particularly when embraced in industrial settings.
One of the major advantages to robotic arm-mounted scanning is that it reduces the amount of human interaction needed within 3D metrology, so there’s less chance of products being measured incorrectly. When deployed on production lines, such solutions are also particularly adept at multitasking at pace, capturing data while simultaneously analyzing part quality.
3D scanner-affixed robotic arms therefore offer a potential solution to the bottlenecks that can occur during high-throughput quality assurance with traditional CMMs. However, attaching 3D metrology solutions to a fixed base naturally restricts them to operating in a predetermined area. As such, these setups require extensive planning in advance and aren’t recommended for addressing use cases where flexibility is a prerequisite.
Fixed-position 3D scanners
Using certain 3D laser scanners, it’s now possible to scan objects on a truly epic scale, ranging from offshore wind turbines to entire buildings and sprawling outdoor environments.
When it comes to doing so, many turn to Light Detection and Ranging (LIDAR) 3D metrology devices – and with good reason. These 3D scanners can be mounted and left to scan on their own accurately, from a distance, with minimal human intervention.
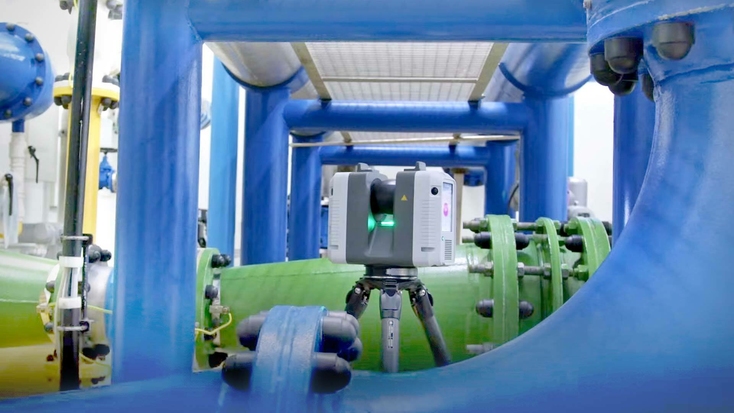
Artec 3D’s latest long-range 3D laser scanner, Artec Ray II, at work.
Where the technology falls down is in smaller-scale applications, an area in which handheld options are often better suited. Additionally, the bar to entry is quite high, especially when it comes to actually using data. As a result, building up your expertise before adoption is advisable.
There are also structured-light and infrared scanning solutions out there that are designed to be affixed to telescopic tripods. However, while these can be set up to acquire data from various heights and at a distance, their static nature means they lose much of the maneuverability that makes handheld devices such attractive capture tools in the first place.
KEY POINT
Before acquiring a metrology 3D scanner, it’s worth considering size and scale — how large is your target object, how many of these do you intend to scan?
If you’re looking for a ‘wild card’ alternative, it may be worth considering photogrammetry. Systems such as the Artec Metrology Kit make it possible to measure with an incredible accuracy of up to 2 microns and complete quality inspection and deformation analysis tasks while accumulating minimal errors. Practically, this means it can be used to measure the geometric changes of components like vehicle parts and storage tanks with high accuracy and analyze their material deformation under load.
While deployable on its own, the kit can also be integrated into wider industrial workflows or used as a reference tool for achieving even higher 3D scanning accuracy over distance.
Best metrology 3D scanners in 2025
So, that (broadly) sums up the different categories of metrology 3D scanners. But which model should you adopt? Let’s run through some of the benefits of our latest 3D metrology solutions.
Artec Ray II
Starting with Artec 3D’s longest-range 3D scanner, Artec Ray II, the device allows objects to be captured from up to 130 meters away with high precision. Not only can Ray II create crisp, detail-rich, accurate scans, but it does so at a pace of up to two million points per second. In practice, this means users can digitize or measure objects ranging from propeller blades to entire factories more quickly and improve their ROI by spending less time on data capture.
Ray II’s sheer speed is supplemented by its Visual Inertial System (VIS), which utilizes feature tracking and advanced algorithms to intuitively navigate each 3D space it encounters and pre-register scans. Alongside the device’s built-in display, this also enables users to track progress in real time by automatically registering data captured in the field. As a result, there’s less risk of having to revisit scan sites in order to scan anything they may have missed.
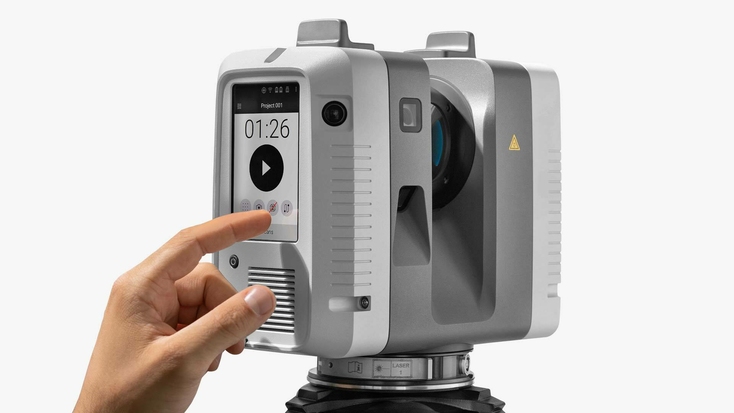
Users can access all the core features of the Artec Ray II 3D scanner via its built-in control panel.
When mounted firmly to a tripod, Ray II is able to capture every object within its radius with a single click. This streamlines the process of carrying out quality assurance on huge objects and vehicles such as cars and airplanes, inside and out, with high accuracy. You can even capture the size and layout of buildings with the device, or deploy it for inspection purposes on the factory floor. Thanks to its tripod mounting, Ray II can also be perched around different locations within a space to ensure that scanned objects are captured from all sides.
If desired, Artec Ray II may be operated via tablet or smartphone as well, making it portable and remotely deployable. If you needed to scan the exterior of a ship, for example, you could mount the device high above the vessel and operate it from ground level, without having to worry about running cables down to a PC monitor so you could track progress.
Artec Micro II
At the opposite end of the scale, we have Artec Micro II. Using the ultra-high-precision device, it’s possible to scan objects with an accuracy of up to 5 microns. In practice, this makes the scanner perfect for reverse engineering or carrying out quality inspection on small objects with intricate designs – think tiny industrial brackets, cogs, and bearings. Elsewhere, it’s possible to capture fine jewelry and dental models, if so desired.
Using its four 13 MPX cameras, Micro II picks up tiny details while peering deep into the recesses of hard-to-see areas for in-depth, repeatable results. Highly automated and compact enough to fit onto your average desktop, it can be easily integrated into existing workspaces, too.
KEY POINT
Little or large, there’s now such a range of 3D scanning solutions, you can pick the one that suits your exact needs.
Artec Spider II
While it could be said that the handheld, blue-light-technology-powered Artec Spider II is similar to Artec Micro II in that it’s built for precision 3D scanning, its portability means it can access a wider range of applications. For instance, Spider II can capture larger objects in high resolution, while its reliance on blue-light technology means it can still achieve an accuracy of up to 0.05 mm.

The metrology-grade Artec Spider II 3D scanner digitizing a crankcase.
Spider II is also ideal for capturing small areas of much larger industrial objects. In fact, with this incredibly versatile 3D scanner, you can render parts with complex geometries, sharp edges, and thin ribs with ease, in a way that really sets it apart as a 3D metrology solution.
Artec Point
Unlike the other handheld 3D scanners on our shortlist, Artec Point is target-based. This means that it usually requires users to add targets to objects prior to data capture.
Theoretically, this limits its applicability. But in return, Point’s reliance on targets does come with numerous benefits. With a sky-high accuracy and resolution of up to 0.02 mm, the device is built specifically for metrology-grade applications where tolerances are at a premium. Point has been tested under ISO conditions, so industrial users know it’ll perform as required.
The scanner’s overall design also lends itself to precision reverse engineering and inspection. It features an arch-like, angled outer frame, providing it with a steep viewing angle that allows it to ‘see’ into obscured areas. Point isn’t restricted by the type of object either. With three scanning modes: one for capturing large objects at pace, another for complex feature capture, and a third for scanning inside deep holes, users can pick the setting that suits their application best.
Artec Metrology Kit
Another option for carrying out industrial measurement tasks is the Artec Metrology Kit. Built around optical photogrammetry rather than structured-light 3D scanning, the system can capture objects with an outstanding single-point measurement accuracy of up to two microns. This, in tandem with the kit’s broad software compatibility, makes it ideal for deformation analysis and inspecting large objects like turbine blades or aircraft parts, with metrology-grade precision.
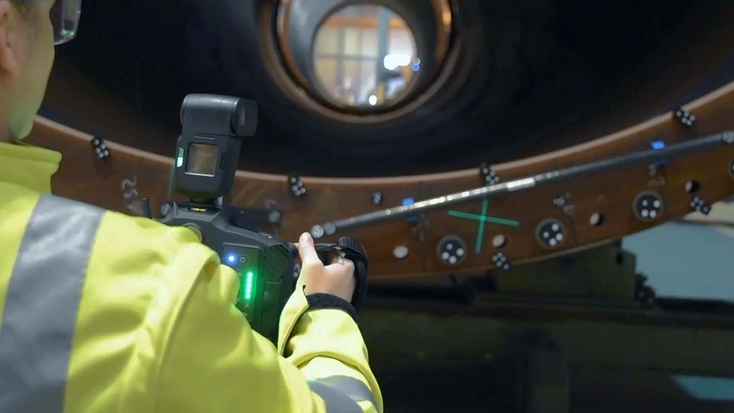
An engineer using an Artec Metrology Kit to measure a large-format build.
In recognition of Artec Metrology Kit’s efficacy in industries like these, it has been certified by the likes of VDI and DAkkS. As such, manufacturers can adopt the Kit safe in the knowledge that it has already passed the US and Germany-based certification bodies’ strict testing regimes and proven its worth as a means of capturing highly accurate scans.
KEY POINT
3D scanning can be deployed alongside photogrammetry to measure large-scale objects with greater accuracy.
Although it’s possible to use the system as a standalone solution, it can also be deployed as a referencing tool for handheld 3D scanners. Doing so improves capture accuracy over distance, particularly when scanning large objects. As a matter of fact, users of both Artec photogrammetry and 3D scanning can achieve 14 times greater accuracy over 15 meters, and the benefits of such setups only scale with larger scanned objects.
How to choose a 3D scanner for metrology
As you can see, there are plenty of different metrology 3D scanners out there. This begs the question: which one should you choose? There’s no such thing as a one-size-fits-all photogrammetry, structured-light, or laser scanning solution, so there are several aspects to consider before buying into the technology.
Accuracy
Most devices are marketed as being accurate to within a certain number of millimeters. In reality, this figure tells you how close a measurement that scanner can get to the true dimensions of an object. Of course, accuracy levels vary by model, but it’s generally accepted that a single-scan accuracy (as opposed to a volumetric accuracy) of 0.1 mm or less is needed to effectively measure or create digital twins of an object.
When it comes to 3D metrology, the higher the range of error, the less effective a device is likely to be. In applications like part inspection, for example, data integrity is essential to ensuring that they have been manufactured in line with initial product designs. Likewise, any significant deviations will create another roadblock to achieving the main goals of quality assurance: detecting and troubleshooting defects and boosting product repeatability.
Resolution
If you are weighing up purchasing a 3D metrology scanner, you’ll also need to consider how intricate a level of detail you’re looking to capture. Scanning complex components covered in dark or reflective surfaces, through holes, or deeply pocketed surfaces is always going to be trickier than with unique, fully dense objects. But you can make life easier for yourself by checking that any scanner you buy meets certain specifications.
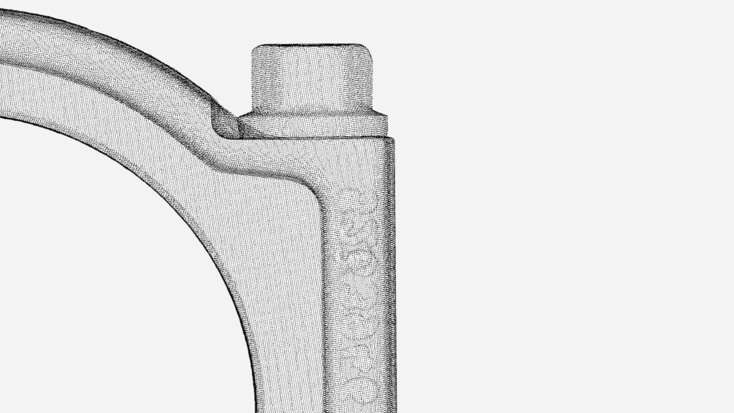
A highly detailed 3D scan captured with Artec 3D’s incredibly precise 3D scanning technologies.
One of the most important of these is 3D resolution. Rather than the resolution of scan images themselves, the term describes the minimum gap between two points on resulting 3D meshes. Greater resolution means more data points to process, but it generally yields models with greater detail too. Those seeking to capture full-color textures will also need to look at the bits per pixel of a device. The higher the BPP, the better the color capture capability.
Scale
It may sound obvious, but prospective 3D scanning adopters first need to consider how large an object they intend to digitize or measure. With handheld devices, for example, you can capture the widest variety of medium to large-sized objects. At Artec 3D, this flexibility is one of the reasons why our cordless, fully maneuverable Artec Leo continues to be so popular. However, if you’re looking to scan at a microscale or capture extremely large objects like aircraft or structures such as buildings, other devices may be better suited.
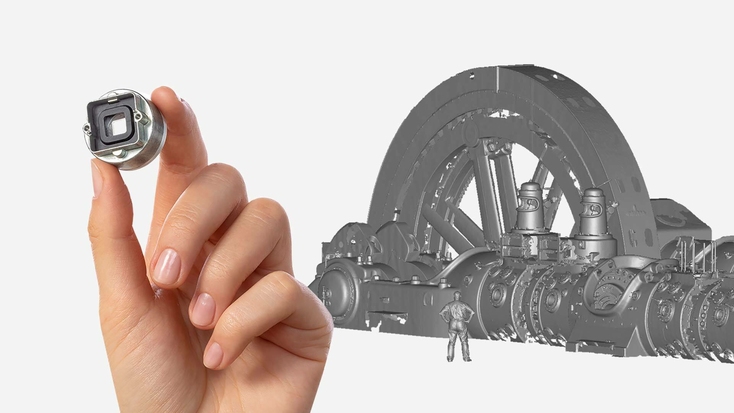
While Artec Micro II captures the finest of details, Artec Ray II is designed to handle much larger objects.
So, how can you tell the capacity of a 3D scanner? Well, the working distance of a device will tell you how close you’ll have to be to capture a given object. Whether you’ll need this figure to be high or low will (at least to some extent) depend on your target application. If you’re planning to capture landscapes or infrastructure from a distance, long-range LIDAR laser scanning is likely your best option. On the other hand, if you’re going to be working in tighter, cramped spaces, a handheld scanner with a short working distance would be more ideal.
Speed
Depending on your application, it’s possible to both 3D scan small parts in high volumes and low numbers of larger builds. We’ve covered large-scale specifications above, so let’s now explore the factors that need considering when aiming to 3D scan for quality assurance in high-throughput areas like production lines.
One of several metrics that require weighing up is a device’s data acquisition speed. Often measured in points per second, the higher this number is, the more rapidly it’s able to pick up data points along the surface of an object. While there are only minor differences between the 3D exposure times of many modern devices, this also has a knock-on effect on speed.
Your 3D scanner’s field of view, or the maximum area it’s capable of capturing from a given distance, can also impact the pace at which you’re able to scan. As an example, the precision-optimized Spider II is adept at scanning within a 171 x 152 mm area, while Artec Leo has a wider range of 838 × 488 mm. This means that while both can capture objects of the same overall size, the former will take longer to do so than the latter.
Elsewhere, things like ease of use can impact throughput as well, given that the longer a 3D scanner takes to master, the less productive users are likely to be. With a flexible, handheld device, it also tends to be easier to work around any obstacles between you and the object you’re trying to measure. As such, scanning convenience isn’t just a matter of user experience, it’s an important part of helping users get on with the task at hand.
Mobility
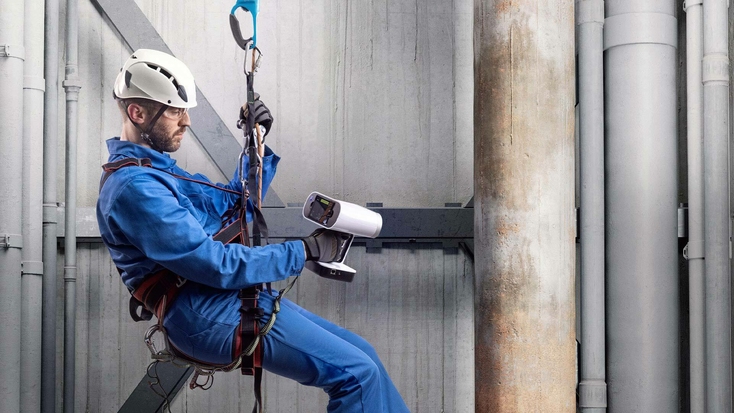
As Artec Leo is entirely cable-free, it can be used to capture scans in challenging conditions.
Last but not least, it’s worth asking: do I need a mounted or handheld 3D scanner? While the former is more likely to be ideal for 3D scanning in high volumes or capturing large objects (think large aircraft parts and factories), using the latter comes with its own permutations.
Theoretically, even lower-cost handheld devices provide a freedom of movement that allows adopters to capture a target object from any angle. But they do tend to come with cables that limit how this can be achieved in practice. Users of these 3D scanners will therefore need to consider power socket proximity, as well as the location of the object they intend to capture.
KEY POINT
Planning ahead can help overcome initial 3D scanning issues. For instance, if you’re finding it difficult due to room or lighting limitations, can you set the target object up elsewhere?
If they were in the automotive industry and tried to scan the inside of a vehicle at an assembly plant, for example, would the cable be able to wind around seats and other interior obstacles?
3D metrology solutions such as Leo overcome these issues by being completely free of cables. In addition to being the world’s first wireless and AI-powered 3D scanner, this portability means the device is better at picking up data from hard-to-reach angles. Thanks to its built-in screen, users can also focus on acquiring all the right data points, without having to keep switching monitors to see how they’re doing.
What are the differences between CMMs and 3D scanners?
Using the above criteria, it’s clear why 3D scanners are making inroads in the field of industrial metrology. Though CMMs still hold a slight advantage in terms of accuracy, reaching just a few microns, many applications aren’t that tolerance-intensive. In such cases, flexible, high-speed scanning is often preferable.
This is particularly true when capturing delicate objects or those that can’t be touched due to contamination issues. Whereas 3D scanners can easily be maneuvered to capture items with complex freeform features, these can also be very difficult for probes to pick up. As such, CMMs may retain an edge in certain aerospace and automotive use cases, but 3D scanning offers a fast, flexible, reliable alternative for reverse engineering and analysis elsewhere.
Key point
It can be easy to focus on speed or accuracy metrics, but don’t forget that flexibility can be key to getting the most from your device!
Where is 3D metrology used?
Quality assurance
One of the widest applications of metrology 3D scanning is part inspection. Within industrial settings, manufacturers use the technology to verify that end components can perform as designed. This process is vital not just for ensuring product quality (and client satisfaction if it’s made for sale) but avoiding costly, time-consuming manufacturing errors.
Though part uniformity is key to the success of most manufacturing initiatives, the level of tolerance for deviations is especially low in certain sectors. In tightly regulated industries like aerospace, components often need to meet stringent heat, weight, and chemical resistance criteria. As a result, inconsistencies here present a potential risk of failure. With 3D scanning, you can prevent this from happening by ensuring that parts are produced to specification.
In one practical aviation application, a team at Luxembourg Air Rescue has previously deployed Artec scanning to 3D model a helicopter. Among other things, this allowed the engineers to inspect the craft’s outer body for damage caused by impacts inflicted when flying in adverse weather or during heavy landings. Using the data gathered, the team continues to be able to minimize chopper downtime by quickly assessing and diagnosing defects.
Reverse engineering
Leveraging the measurements gained via 3D metrology solutions, it’s also possible to reverse engineer, digitize, and tweak a component’s parameters to improve its performance. Such digitization can be particularly handy when it comes to sourcing legacy parts, as once discontinued, they can get rare or expensive, and in some cases disappear entirely. Rather than phasing out or upgrading old equipment, the 3D scanning process offers manufacturers a means of cost-effectively repairing and retaining it.
Of course, doing so effectively depends on users ascertaining the design intent of the part’s inventor and minimizing accumulated errors. Parts with dark or reflective surfaces, as well as those with organic shapes, will also naturally be trickier to digitize. But with software packages like Artec Studio, which allow for the automatic alignment of scans, as well as providing users with manual and auto-surfacing tools, it’s definitely getting easier to achieve.
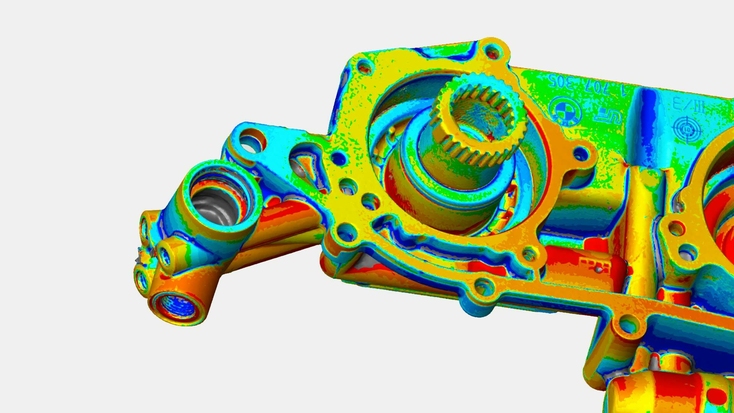
Artec Studio distance mapping being used to assess areas of deviation.
If you need access to more advanced 3D scan inspection tools, Artec Studio also features seamless compatibility with software like ZEISS INSPECT Optical 3D and Geomagic Control X.
Product testing & iteration
During product development, being able to rapidly digitize and iterate upon designs is fundamental to success. 3D scanning makes creating high-accuracy 3D models quick and easy, in a way that accelerates the wider design process. Likewise, initial prototype inspection is vital to identifying and ironing out any defects – 3D scanners can play a key role here as well.
At ASICS, for example, running shoes are 3D scanned for design inspection, iteration, and marketing using Spider II’s predecessor, Artec Space Spider. Integrating the technology into the firm’s workflow has improved its visualization capabilities and allowed it to better assess products before they hit the shelves. In manufacturing, the same concept can be applied to legacy part capture as a means of implementing design upgrades during retrofits.
Deformation analysis
As with aerospace structures, many of the design elements seen in the automotive industry are subject to intense deformation under load. For safety reasons, carmakers are therefore obligated to analyze how their performance is affected by continued usage. But how do they manage to do so rapidly, and with the metrology-grade precision needed?
Many now use 3D scanning to either assess how prototypes are likely to perform, or parts like storage tanks are affected by different driving conditions over time. Unlike CMMs, the technology can also be deployed at a rapid pace. This makes it better suited to analyzing the position of components such as welding studs in car chassis on active production lines.
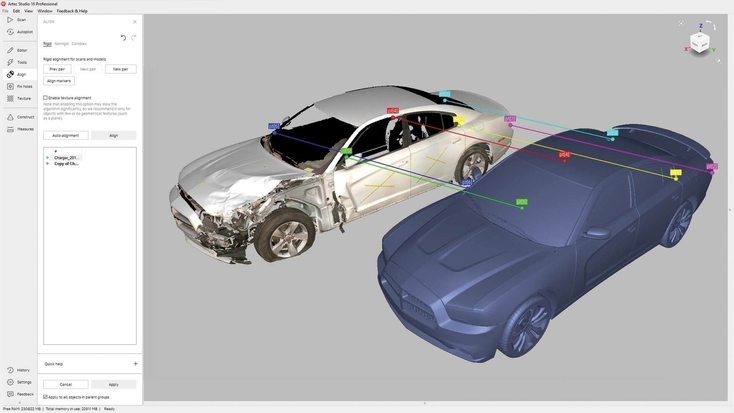
A Dodge Charger scan being merged with an exemplar 3D model of the same vehicle in preparation for inspection on Artec Studio.
On a larger scale, 3D scanning is also perfect for inspecting infrastructure degradation over time. Research in the US has demonstrated that the technology is capable of uncovering the capacities of structures like bridges accurately, at high speed, across the country.
Conclusion
Overall, the scope of metrology 3D scanning applications may be quite broad, but it’s clear that the technology is particularly effective at helping improve product quality. The technology predominantly does so by facilitating the collection of accurate 3D measurements, which then allow manufacturers to better understand how end parts will perform and why they do so.
In practice, this information not only enables 3D scanning users to bring products to market more quickly, but also provides them with a means of reverse engineering legacy parts they still use. Elsewhere, some are also turning to devices that can be mounted to robotic arms, so they can deploy the technology at a greater scale and urgency than CMMs currently allow.
It is these speed, scale, and flexibility advantages that make the 3D scanning process such an attractive alternative to legacy measuring methods like the use of coordinate measurement machines, particularly when it comes to inspection or reverse engineering applications.
Read this next
More from
the Learning center
To truly understand how some of the world's best 3D scanners capture objects of all sizes and complexities, we first need to take a closer look at how structured light works. In this easy-to-read article, you'll also learn about the advantages of structured light over other technologies, including CMM machines and CGI photogrammetry. Then we'll cover a few potentially challenging surfaces for structured-light 3D scanners.
Reverse engineering is a process where a physical part is deconstructed and measured in order to understand its design, how it works, and how it was made. This could be anything from a massive aircraft carrier or architectural structure, all the way down to a Swiss watch’s tiny set of interlocking gears.
After reviewing the top 3D scanner lists available on the Internet, we noticed that most don’t include information about the key parameters of the objects you need to scan. Important categories such as object size and the application(s) you’ll be using the scanner for are not covered. This review aims to fill this gap and help you find the best 3D solution for your project.


